HonestyHive Team

Featured Review

Lodge Cast Iron Skillet Review: The Only Pan Worth $20 That Lasts Forever
85.0Read →
HonestyHive Team avatar
Trusted

HonestyHive Team

@honestyhiveteam

85
Trust Score
8Total Buzzes
0Followers
0Following

Apple Watch Series 10 vs Garmin Venu 3: Smartwatch vs Fitness Watch

No ratings yet

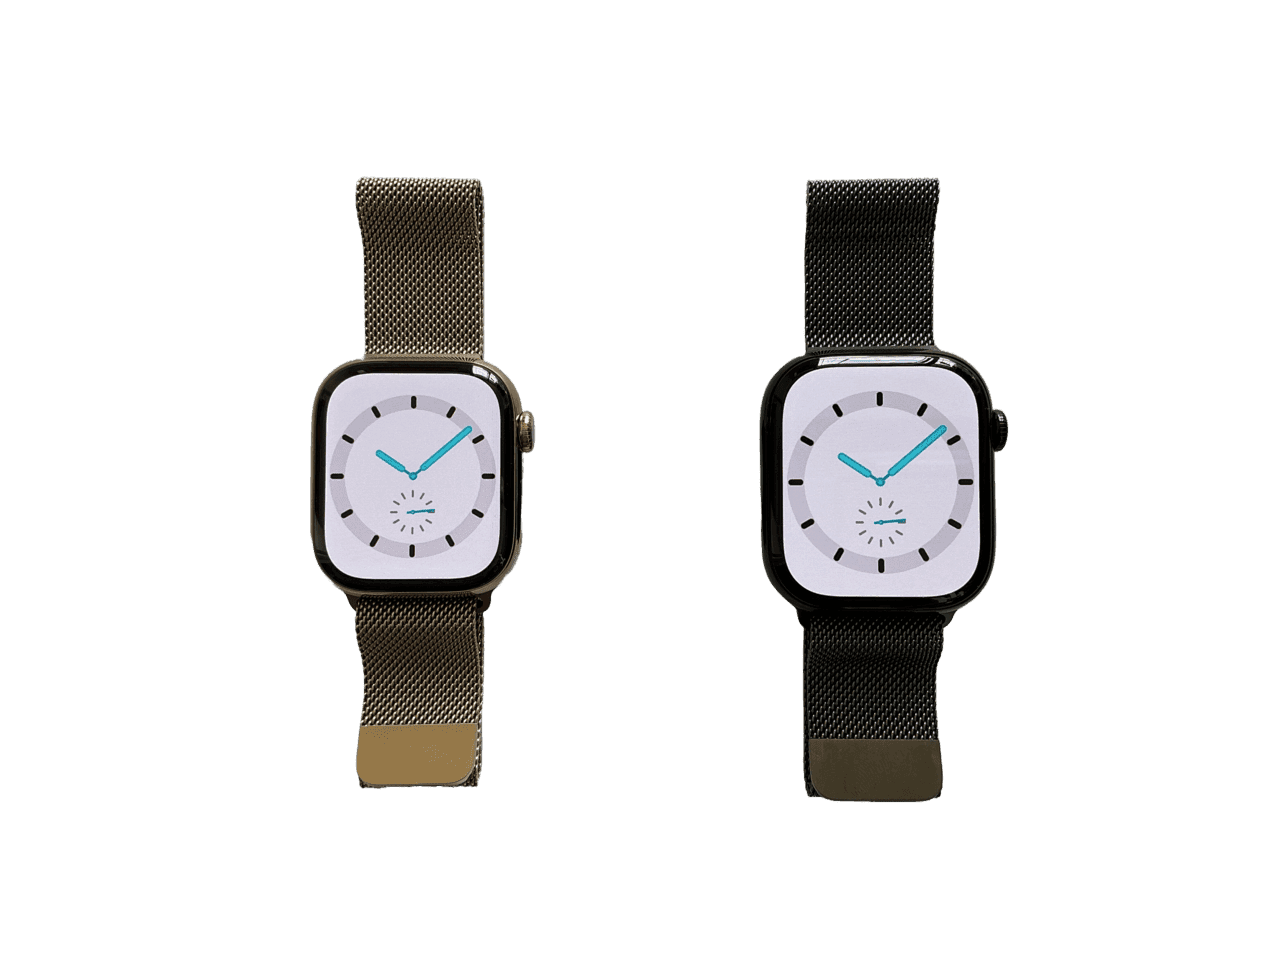
The Smartwatch vs the Fitness Watch: Two Tools for Two Different People This comparison is unusually clean because the Apple Watch Series 10 and the Garmin Venu 3 are built with genuinely different primary goals. The Apple Watch is a smartwatch that tracks fitness. The Garmin Venu 3 is a fitness watch that includes smart features. If you can identify which direction you're coming from — smartwatch-first or fitness-first — the decision almost makes itself. I've worn both for extended periods and rotated between them. Here's what I actually found. Fitness Tracking: Garmin Is Meaningfully Better Apple Watch fitness tracking is good. It's not the category leader. Garmin's GPS accuracy is noticeably better for outdoor runs and hikes — routes traced on a Garmin are tighter and more accurate, particularly in areas with partial sky coverage (near tall buildings or tree cover). For cycling, Garmin also edges out Apple Watch on power meter accuracy when connected to a compatible sensor. The Garmin Venu 3's sleep tracking is more detailed and more actionable. Apple Watch gives you sleep stages and a rough Sleep Score. Garmin gives you HRV (heart rate variability) trends over time, a Body Battery score that reflects your cumulative recovery, and a morning readiness report that tells you how hard to push that day. The Body Battery feature is genuinely useful for athletes managing training load — if your Body Battery is at 30%, you're being told not to do a hard interval session today. Over months of use, this behavioral feedback loop is measurably useful. "The Garmin's Body Battery has accurately predicted days where I felt physically depleted about 80% of the time. It's the first wearable metric that has actually changed my training decisions." Battery Life: Garmin Wins Decisively This is the most stark difference between the two devices. Apple Watch Series 10 is rated at 18 hours of standard use, up to 36 hours in low-power mode. Real-world experience: charge it every night. If you forget one night, you'll be anxious about it the next day. The Series 10 improved from previous Apple Watch generations, but daily charging is still the expectation. Garmin Venu 3 is rated at 14 days in smartwatch mode, 5 days with GPS active continuously. Real-world experience: I charge mine roughly once every 7-10 days depending on workout frequency. Going from charging a device every night to charging it once a week changes your relationship with the product. You stop thinking about it. You just wear it, including during sleep, which improves sleep tracking accuracy. Smart Features: Apple Watch Is Substantially Better For smartphone integration, Apple Watch has no peer in the iOS ecosystem. Notifications are clear and actionable, apps are responsive, Apple Pay works reliably (I've used Watch payments more than 500 times without a failure), iMessage replies from the wrist work, and the app store has tens of thousands of applications. Garmin's smart features are functional but limited. Notifications from your phone display on the watch but are read-only — you cannot reply, dismiss with actions, or interact meaningfully. The Garmin app store is vastly smaller. Garmin Pay works at supporting terminals but the infrastructure is less widely supported than Apple Pay in the US. Important note: Garmin Venu 3 works with both iPhone and Android. Apple Watch requires iPhone. Display and Design Apple Watch Series 10 is the thinnest Apple Watch yet, with a beautiful LTPO OLED display. It's unambiguously a premium fashion accessory. The Garmin Venu 3 has an AMOLED display that is also excellent and bright, but in a rounder, sportier form factor that reads more clearly as "fitness device" than "luxury tech accessory." Both are water-resistant and durable; both look appropriate in professional settings. Value Apple Watch Series 10 starts at $399. Garmin Venu 3 is typically $399-449 depending on version. They're priced similarly. The value question depends on which features you actually use. The Verdict Buy the Apple Watch Series 10 if: You're deeply embedded in Apple's ecosystem (iPhone, iPad, Mac, AirPods), you want to use wrist payments, you respond to notifications from your watch, you care about app availability, or smartwatch features are equally important as fitness to you. Buy the Garmin Venu 3 if: Fitness and health tracking are your primary use case, battery life is important to you, you run or cycle seriously and want accurate GPS, you sleep with your watch on for sleep tracking, you use Android, or you want actionable recovery metrics that change your training decisions. Serious athletes and runners specifically: get the Garmin. The GPS accuracy, Body Battery, HRV tracking, and training load management are meaningfully better than what Apple provides, and the category gap between them is wider than the casual fitness market typically acknowledges. This article was written by the HonestyHive team to demonstrate the kind of honest, in-depth content we're building this platform for.

Read more
Product product image

Apple AirTag 4-Pack Review: Best Tracker Available, But the Privacy Gaps Are Real

No ratings yet

Apple's Tracker Is the Best Available — But Let's Talk About the Privacy Issues Honestly I've been using AirTags for about eighteen months across two use cases: on my keychain (because I lose my keys with embarrassing frequency) and in my checked luggage when I travel. Both have worked well. But this review would be incomplete if I didn't spend real time on the privacy and stalking concerns, because they're legitimate and Apple's responses to them have been only partially adequate. What AirTags Are Actually Good At Finding lost keys is the most mundane use case and the one that provides the most daily value. When my keys are somewhere in my apartment, the AirTag lets me trigger a sound from my phone to locate them. This has saved me probably 15-20 minutes of frantic searching per month. At $29 for a single tag, the ROI was achieved within weeks. Luggage tracking during flights is where AirTags genuinely shine beyond what any alternative offers. The Find My network — which uses opt-in pings from the ~1.5 billion active Apple devices worldwide — means even in an airport baggage area with no cellular signal, nearby iPhones are silently relaying your AirTag's location without anyone knowing. My bag's location updated while it sat in a Miami layover at 2am because presumably an airport worker's iPhone walked past it. "On a flight where my bag was delayed, I watched it ping from the baggage carousel, to a storage room, to a different carousel — all on my phone while I was eating dinner." Precision Finding: The Feature Nobody Talks About Enough When you're within Bluetooth range (~30-40 feet), AirTags switch from network location to Precision Finding — using the iPhone's Ultra-Wideband chip for centimeter-level accuracy. Your phone shows a distance in feet and an arrow pointing toward the tag. I walked to within about 8 inches of where my keys were behind a couch cushion by following the arrow. This is genuinely impressive technology that Tile and Samsung SmartTag cannot match without UWB-enabled devices. The catch: Precision Finding only works on iPhone 11 and newer (UWB chip requirement). iPhone 12 and older users get Bluetooth-only proximity, not the directional arrow. The Battery Situation (Positive) AirTags use the CR2032 coin cell battery, which is rated for about a year of use. Apple gives you a notification when it's getting low. Replacement CR2032 batteries cost around $1 each at any drugstore. This is genuinely good design — proprietary rechargeable batteries that require a cable would be much more annoying. Apple made the right call here. The Stalking and Privacy Problem — Addressed Honestly AirTags have been used to stalk people. This is a documented fact, not a hypothetical concern. Apple has implemented anti-stalking protections, but they have real gaps that deserve honest discussion. Current protections: If an AirTag separated from its owner travels with you, your iPhone will notify you after 8-24 hours (the window varies based on circumstances) The AirTag will eventually play a sound to alert you to its presence Android users can use Apple's "Tracker Detect" app — but it requires manual scanning The gaps: The 8-24 hour alert window is significant — a stalker could track someone's location for most of a day before detection The speaker is quiet enough that in a car or noisy environment, the sound may not be audible Android detection requires deliberate action (downloading and running the app), not passive protection Technically sophisticated bad actors have modified AirTags to disable the speaker How It Compares to Tile and Samsung SmartTag Tile: Works on both iOS and Android, larger third-party network than Samsung, but much smaller than Find My network. No UWB Precision Finding on most Tile models. Subscription required for some features. If you're Android-only, Tile is the better choice. Samsung SmartTag: Excellent for Galaxy phone users — tight integration, UWB Precision Finding available on compatible devices. But the SmartTag network is limited to Samsung devices, which dramatically reduces coverage in non-Samsung-heavy areas. Only worth it if your entire household is Samsung. Who Should Buy This? iPhone users who lose things: Yes. The 4-pack makes sense — keys, bag, backpack, and something you stash in your car. Frequent travelers: Strongly recommend for luggage. Android users: Consider Tile instead — the Find My network doesn't work with Android. People worried about being stalked: Download a tracker detection app and scan your belongings periodically. The protection gap is real. Bottom line: 8.5/10. The best tracker available due to Find My network coverage and Precision Finding. The privacy concerns are real and deserve more than partial mitigation from Apple. Use them for legitimate tracking. Be aware of the technology around you. This article was written by the HonestyHive team to demonstrate the kind of honest, in-depth content we're building this platform for.

Read more
Product product image

Hario V60 Review: The Best Coffee Maker With the Steepest Learning Curve

No ratings yet

The Best Coffee You'll Ever Make — After the Worst Two Weeks of Your Coffee Life I drank bad drip machine coffee for four years before someone made me a pour-over at a coffee shop and I tasted something I genuinely didn't know coffee could taste like: clean, bright, layered, with flavor notes that changed as the cup cooled. I bought a Hario V60 that week. I've been using it for two years. And I'm going to be completely honest with you about what that experience has actually been like. The First Two Weeks Are Going to Suck Let me save you the confusion: your first attempts will produce bad coffee. Maybe watery, maybe bitter, maybe somehow both at once. This is not the equipment failing. This is you learning to control multiple variables simultaneously — grind size, water temperature, pour rate, bloom time — without feedback on which one is wrong. It gets better fast, but the learning curve is real and you should walk in expecting it. The V60 is unforgiving in a way that a drip machine simply isn't. A drip machine controls almost everything for you. The V60 hands that control to you, and control requires skill. "By week three, I was making coffee that was genuinely better than what I was paying $6 for at the coffee shop down the street." The Recipe (Once You Have the Gear) Here's the baseline recipe I settled on after a lot of experimentation: Coffee: 20 grams, medium-fine grind (slightly coarser than espresso, finer than drip) Water: 320 grams total, 195-205°F (just off boil, or boil and let sit 30 seconds) Bloom: Pour 40-50g of water over grounds, wait 30-45 seconds until blooming subsides Main pour: Pour remaining water in slow, steady circles over 2-2.5 minutes Total brew time: 2.5-3.5 minutes from first pour to last drip If your brew drains too fast (under 2 minutes), grind finer. Too slow (over 4 minutes), grind coarser. Bitter coffee = too fine or too long. Sour/weak coffee = too coarse or too short. That's the whole debugging process. The Hidden Cost of "A $15 Dripper" Here's the thing the marketing doesn't tell you: the V60 is the least expensive part of the setup you actually need to make good coffee with it. Gooseneck kettle: Required. A standard kettle cannot control pour rate and precision the way a gooseneck can. Budget $35-60 for a decent one, $100+ if you want temperature control. Burr grinder: The single most important piece of equipment in coffee. A blade grinder produces inconsistent particle sizes that lead to uneven extraction (simultaneously under and over-extracted). A decent burr grinder starts at $50 (Timemore C2) and goes up to $200+ for electric options. Kitchen scale: Not optional if you want consistent results. $10-15 at any kitchen store. The realistic minimum investment to make good V60 coffee: $120-200 in additional gear. The V60 is the cheapest component. Anyone selling the dripper as a "$15 upgrade to your coffee routine" is leaving out most of the story. Plastic vs Ceramic: Counterintuitive Truth The Hario V60 comes in plastic, ceramic, glass, and copper. The ceramic version is the most aesthetically pleasing and most people buy it. Here's the counterintuitive truth: the plastic version makes better coffee , particularly in cooler environments. Ceramic absorbs heat from your brew water — the first 30-60 seconds of your pour are heating the dripper, not extracting from the coffee. The plastic version, being a worse thermal conductor, maintains water temperature more consistently throughout the brew. If coffee quality is your primary goal: plastic. If you want something that looks beautiful on your kitchen counter: ceramic. Both make excellent coffee once you account for the thermal difference in your technique. Who Should Buy This? People who love coffee and want to get better: Absolutely. This is one of the best learning tools in coffee. People who want caffeine fast in the morning: Get a drip machine or an AeroPress instead. People who already have a burr grinder and gooseneck: This is a no-brainer purchase. People who want to test the waters: Get the plastic V60 — it's $10 and has minimal downside risk. Bottom line: 9/10. The Hario V60 makes extraordinary coffee once you learn to use it. The learning curve is real, the hidden costs of proper supporting gear are real, and it requires a daily time investment (about 7-10 minutes from grinding to cup) that a drip machine doesn't. If you're willing to make that investment, the results are genuinely rewarding. This article was written by the HonestyHive team to demonstrate the kind of honest, in-depth content we're building this platform for.

Read more
Product product image

Instant Pot Duo vs Ninja Foodi: Which Multi-Cooker Actually Wins?

No ratings yet

The Original vs The Overachiever: Which Multi-Cooker Actually Wins? The Instant Pot Duo 7-in-1 and the Ninja Foodi 14-in-1 both sit at the intersection of "pressure cooker" and "I want to simplify my kitchen." But they approach that goal completely differently. The Instant Pot is focused — it does a handful of things extremely well and keeps everything simple. The Ninja Foodi is ambitious — it tries to be every appliance you own, all in one. After using both extensively, I have a clear recommendation, though it comes with nuances. The Instant Pot: The Original and Still Excellent The Instant Pot Duo 7-in-1 does pressure cooking, slow cooking, rice cooking, sautéing, steaming, making yogurt, and warming. Seven functions. The interface is a simple dial and buttons. The recipe community online is enormous — whatever you want to make, someone has already perfected it for the Instant Pot and posted it. There's a genuine collective intelligence around this device that makes the learning curve gentler than almost any other kitchen appliance. Pressure cooking a whole chicken from frozen to done in 45 minutes: done. A beef stew that tastes like it simmered all day: done in 35 minutes under pressure. Dry beans from unsoaked to tender in an hour: done. These are the Instant Pot's specialties, and it executes them reliably every time. "I've made probably 400 meals in my Instant Pot over three years. I've had exactly one failure, and it was user error (forgot to close the vent)." The Ninja Foodi: The Jack of Many Trades The Ninja Foodi 14-in-1 does everything the Instant Pot does, plus air frying, baking, roasting, broiling, dehydrating, sous vide, and several more modes. The SmartLid is its defining feature — one lid that switches between pressure and air-frying modes without swapping lids (an earlier Ninja Foodi limitation). This is a genuine improvement and the lid-swapping complaint about older models is no longer valid. The air frying function is decent — it produces crispy food and works well for chicken wings, frozen foods, and vegetables. It is not as good as a dedicated air fryer (the air doesn't circulate as evenly), but it's capable enough for most uses. If it's replacing your air fryer AND your pressure cooker, the value case is solid. The baking function is a pressure-steam hybrid that produces moist baked goods — less useful for traditional baking but good for bread pudding, cheesecake, and steamed desserts. Where the Ninja Falls Short Size is the first problem. The Ninja Foodi is significantly larger and heavier than the Instant Pot. On a typical kitchen counter, it takes up noticeably more real estate. If your kitchen is small, this is a real consideration. Cleaning is the second problem. The Ninja Foodi has more components — the SmartLid has more internal parts, there are more seals to clean, and the air frying function produces more splattering than pressure cooking alone. Each cook leaves more cleanup than an equivalent Instant Pot session. Complexity is the third problem. Fourteen functions sounds impressive until you realize most people use three or four functions regularly. The additional buttons and modes create interface complexity that the Instant Pot avoids by doing less. Error recovery when something goes wrong (wrong mode selected, wrong settings) is more confusing on the Ninja. Price is the fourth consideration. The Instant Pot Duo 6-quart is often $60-80. The Ninja Foodi 14-in-1 runs $150-230 depending on size and retailer. You're paying 2-3x more for the additional functions. The Honest Verdict for Most People For most home cooks, the better combination is the Instant Pot Duo ($60-80) plus a dedicated countertop air fryer ($50-80). Together they cost less than the Ninja Foodi, take up less total space because the air fryer is smaller, and both do their respective jobs better than the all-in-one does either. The Instant Pot's pressure cooking is cleaner and simpler, and a dedicated air fryer circulates air better than the Foodi does. The Ninja Foodi wins if: you have a genuine space constraint where one device is better than two, or you cook a lot of recipes that benefit from the pressure-to-air-fry handoff (like pressure-cooked chicken finished with air frying to crisp the skin — a legitimately excellent technique). Who Should Buy Which Buy the Instant Pot: You want a reliable pressure cooker with a simple interface and huge recipe community. Buy the Ninja Foodi: You have counter space, want genuine all-in-one capability, and specifically want the pressure-to-crisp workflow. Buy the Instant Pot + air fryer: For most people, this is actually the better choice than either one alone. This article was written by the HonestyHive team to demonstrate the kind of honest, in-depth content we're building this platform for.

Read more
Product product image

Anker 737 Power Bank Review: 24,000mAh That Can Actually Charge Your Laptop

No ratings yet

A 24,000mAh Brick That Can Actually Charge Your Laptop Power banks have a dirty secret: most of them can't meaningfully charge a laptop. They can keep it from dying if you're doing light work, but fast-charging a MacBook from 20% to 80% while you're working? Most don't have the wattage for it. The Anker 737 (24,000mAh) is one of the few that genuinely can — but you're going to feel it in your bag. The Numbers That Matter Let's start with capacity and charging speeds because that's the whole point: 24,000mAh / 140W total output — this is the max output spec, which requires using both USB-C ports simultaneously Single port max output: 140W via the top USB-C port — enough to fast-charge a MacBook Pro 14-inch at its rated speed Input: 65W via USB-C — meaning it takes about 2.5 hours to fully recharge the power bank itself How many full charges does 24,000mAh translate to in practice? iPhone 15 Pro: approximately 4.5-5 full charges (real-world efficiency losses account for the gap from theoretical) Samsung Galaxy S24: approximately 4-4.5 full charges iPad Air (M2): approximately 1.8-2 full charges MacBook Air M3: approximately 60-70% of a full charge (the 52.6Wh battery versus ~22,200mWh effective output) MacBook Pro 14-inch: approximately 40-50% of a full charge "For the first time, I actually left my MacBook charger at home for a two-day work trip. The 737 covered it." The Display Is Genuinely Useful The Anker 737 has an LED display showing remaining battery percentage and live wattage draw. This sounds like a gimmick but it's actually useful. You can see exactly how much power is going to your device and whether you're getting fast-charge speeds. It showed 89W charging my MacBook Pro, which is real fast-charging. It showed 27W on my phone, which matched the phone's own USB Power Delivery negotiation. Useful, not marketing. The Weight Problem Is Real The Anker 737 weighs 1.27 pounds (576 grams). For context, a MacBook Air weighs 2.7 pounds. You're adding roughly half a laptop's worth of weight to your bag. For an airport day where you're moving from gate to gate, a hotel, a conference, and back — having a fully charged laptop at all times is worth carrying 1.27 extra pounds. I've done it repeatedly and made peace with it. For a daily commute where you have access to outlets or only use your phone? This is massive overkill. Get an Anker PowerCore 10,000 instead — it's smaller than your phone, weighs 6 ounces, and costs $25. The 737 also doesn't fit in most pants pockets or small clutch bags. It's a "in your backpack" device, full stop. Airline Carry-On Rules Important: at 24,000mAh / ~88.8Wh, this is under the 100Wh limit for airline carry-on. You can bring it on a plane, but it must go in your carry-on, not checked baggage (lithium battery rules). At 100Wh you'd need airline approval; at 88.8Wh you're under the automatic limit. Worth knowing before you travel. Who Should Buy This? Frequent business travelers: Strong yes. The ability to leave your laptop charger behind and know you're covered is genuinely valuable. Digital nomads who work in cafes: Yes, especially if outlets aren't reliable. Daily commuters who use their phone and laptop: Overkill. The weight isn't worth it for typical commute distances from an outlet. Emergency kit/car travel: Excellent choice — stays in the bag for when you need it. Bottom line: 8/10. The 737 does what it promises — it can genuinely fast-charge a laptop, holds enormous capacity, and the display is a nice touch. The weight is the honest tradeoff you're making, and it's worth it for travel but overkill for daily commuting. This article was written by the HonestyHive team to demonstrate the kind of honest, in-depth content we're building this platform for.

Read more
Product product image

Lodge Cast Iron Skillet Review: The Only Pan Worth $20 That Lasts Forever

No ratings yet

The $20 Pan That Lasts a Lifetime (Mostly) I own six pans. Three of them are specialty items that serve a purpose: a non-stick for eggs, a carbon steel for crepes, a stainless tri-ply for sauces. And then there's my Lodge 10.25-inch cast iron skillet — the one I bought for $20 at a hardware store seven years ago that has outlasted two sets of everything else. This is not a love letter. Cast iron has real limitations that the internet tends to downplay in its zeal for the aesthetic. Let me give you the actual picture. What Cast Iron Is Genuinely Great For Searing meat. Full stop, nothing comes close. The Lodge's ability to hold heat means when you put a cold steak on the surface, the temperature doesn't crash. You get the kind of brown crust — the Maillard reaction in full effect — that lighter pans simply cannot achieve. I've made restaurant-quality sears on ribeyes, pork chops, and chicken thighs in this skillet that I genuinely couldn't replicate in a stainless pan without much more finesse. Cornbread baked in cast iron is transcendent. Frittatas. Roasted vegetables. Anything that benefits from starting on the stovetop and finishing in the oven, because this pan handles both seamlessly (as long as your oven handle situation is taken care of — use a towel or a silicone grip). It also has legitimate superiority for campfire and outdoor cooking, and for stovetops including induction. "The Lodge at $20 genuinely performs on par with pans costing ten times more for the right tasks." The Myth About Soap Let me address this directly because it causes unnecessary anxiety: you can use soap on cast iron . The old warning was about lye-based soaps, which were genuinely harsh enough to strip seasoning. Modern dish soap (Dawn, Palmolive, whatever) is nowhere near caustic enough to damage a well-seasoned pan. A small amount of mild soap, a quick scrub, rinse well, dry immediately, and you're fine. The "never use soap" rule is outdated and causes people to under-clean their pans, which leads to rancid oil buildup over time. What you actually shouldn't do: soak the pan in water, or leave it wet. Rust is the real enemy, not soap. Where Cast Iron Falls Short Eggs. I know, I know — people swear their cast iron is non-stick for eggs. It isn't. Not really. It's non-stick in the sense that a well-seasoned pan with lots of butter or oil won't weld the egg to the surface. But compared to a proper PTFE non-stick pan, scrambled eggs in cast iron require either more fat, more attention, or both. I have both a Lodge and a standard non-stick, and for eggs every morning, I reach for the non-stick every time. Weight: 5.4 pounds. This is not a casual wrist-flick-to-toss-vegetables pan. If you have wrist issues, take this seriously. Acidic foods: Tomato-based sauces, wine reductions, anything highly acidic will react with iron. Short exposure is fine (deglazing with wine to make a pan sauce takes 30 seconds and is fine). Extended simmering of tomato sauce in cast iron is not recommended — it imparts a metallic taste and strips seasoning. Seasoning maintenance: The internet makes this feel like a mystical ritual. It's not. Use it, dry it, occasionally rub with a thin layer of oil. That's it. The "re-season in the oven" thing you see online is helpful if the pan got rusty or stripped — it's not a regular maintenance requirement. The Lodge Specifically Lodge is the obvious recommendation because it's the best value in cast iron by a significant margin. The cooking surface has a slightly textured (factory-seasoned) finish compared to the smooth interior of vintage cast iron or premium brands like Smithey or Stargazer. The texture makes no practical difference for most cooking. Pre-seasoned from the factory means it's usable immediately. American-made, and Lodge has been around since 1896. The one legitimate complaint is that the handle is a bit short, which can make it harder to maneuver with an oven mitt. The longer handle versions (Lodge's "Chef Collection" line) address this at a modest price premium. Who Should Buy This? Everyone: There is no kitchen that shouldn't have a cast iron skillet. The question is whether it should be your only pan (it shouldn't). People who sear meat regularly: Mandatory. Buy this. People who primarily cook eggs: Get a good non-stick AND a cast iron. People worried about maintenance: It's way easier than the internet makes it sound. Just dry it after washing. Bottom line: 9/10. At $20, the Lodge is a genuinely exceptional value that will outlast every other pan you own if you treat it reasonably. Just don't try to make your morning eggs in it without an ample supply of butter, and ignore any advice that says you can never use soap. This article was written by the HonestyHive team to demonstrate the kind of honest, in-depth content we're building this platform for.

Read more
Product product image

Nintendo Switch OLED vs Steam Deck: Two Different Philosophies of Portable Gaming

No ratings yet

Two Completely Different Philosophies of Portable Gaming Comparing the Nintendo Switch OLED to the Steam Deck is a bit like comparing a great family SUV to a performance sports car. They both get you from Point A to Point B, but they're engineered for fundamentally different purposes, different users, and different priorities. After owning both for extended periods, I can tell you clearly which one wins — but the answer depends entirely on who you are. The short version: Nintendo Switch OLED if you want polished, portable, family-friendly gaming with exclusive Nintendo titles. Steam Deck if you're a PC gamer who wants your Steam library in your hands. They're not really competitors — they're products for different people who happen to sit in the same device category. Game Library: Nintendo's Exclusives vs Everything Else This is the central question, and it cuts both ways. The Nintendo Switch has games you cannot play anywhere else: The Legend of Zelda: Tears of the Kingdom, Super Mario Bros. Wonder, Pokémon Scarlet/Violet, Pikmin 4, Metroid Prime Remastered. These titles are genuinely excellent — some of them are among the best games made in the last decade — and they exist nowhere but Nintendo hardware. If the games you want to play are Nintendo exclusives, the choice is made for you. The Steam Deck plays your existing Steam library. If you already have hundreds of games in Steam (and many PC gamers do), the Steam Deck gives you access to most of them portably — essentially for free beyond the hardware cost. It also runs emulators that let you play games from older Nintendo consoles, Game Boy Advance, PS2, and beyond. The game library breadth advantage goes to Steam Deck by an enormous margin, but only if you already have games there to play. "The Steam Deck is an extraordinary value if you already own a Steam library. If you don't, you're buying hardware that requires building the library at the same time." Display: OLED vs LCD The Switch OLED's 7-inch OLED screen is beautiful — vibrant colors, deep blacks, excellent visibility in dim environments. It's genuinely one of the nicest handheld screens I've used. Resolution is 720p in handheld mode, which is fine for the screen size at typical handheld viewing distance. The Steam Deck's 7-inch LCD screen has higher resolution (1280×800 versus 1280×720) but noticeably less punchy colors and contrast compared to OLED. The screen is fine — it's not bad — but side by side with the Switch OLED, the Switch wins the display comparison easily. Portability: Switch Wins Clearly The Switch OLED weighs 0.93 pounds and fits in a large pocket. The Steam Deck weighs 1.47 pounds and does not fit in anything resembling a pocket. This might sound minor until you're trying to play for 30 minutes on a bus versus just putting the thing in your bag and forgetting it's there. The Switch is genuinely portable. The Steam Deck is portable in the sense that you can carry it — it's not something you toss in a jacket pocket. Both devices include cases in the box. The Steam Deck's case is better than the Switch's carrying case (which requires the dock to be packed separately for TV use). Performance: Steam Deck Is Significantly More Powerful The Steam Deck runs an AMD Zen 2 CPU and RDNA 2 GPU. The Switch runs an aging Nvidia Tegra X1 (or X1+ in OLED version). The Steam Deck can run modern PC games at medium-high settings. The Switch cannot, and Nintendo titles are optimized for the hardware rather than being graphically demanding. For graphical fidelity and raw computing power, Steam Deck wins by a large margin. The Steam Deck runs hotter and its fans are audible in quiet environments. The Switch is near-silent in handheld mode. Battery Life: Switch Wins Nintendo claims 4.5-9 hours for the Switch OLED (varies by game). Real-world experience: 5-7 hours on most titles, 3-4 hours on the most demanding ones. The Steam Deck's battery life is 2-8 hours, with real-world results of 2-4 hours on demanding games. For long travel, the Switch requires significantly less anxiety about battery. Value: Depends Heavily on Your Situation Nintendo Switch OLED: $350 for the console. Games cost $40-70 each new, or you can subscribe to Nintendo Switch Online + Expansion Pack ($50/year) for access to a library of older titles. Steam Deck 512GB OLED (the current top model): $549. But if you already own a Steam library, you're essentially unlocking games you've already paid for. If you have 200 games in Steam, the Steam Deck's value proposition is extraordinary. The Verdict Get the Nintendo Switch OLED if: You want to play Nintendo exclusives (Zelda, Mario, Pokémon), you want something the whole family can share, you value battery life and true portability, or you're buying for a child. Get the Steam Deck if: You're a PC gamer with an existing Steam library, you want access to indie games and emulation, graphical performance matters to you, or you want to run a wider variety of game genres. The Switch and Steam Deck are genuinely for different people. Choosing between them is less about which is "better" and more about which library and ecosystem serves your actual gaming habits. This article was written by the HonestyHive team to demonstrate the kind of honest, in-depth content we're building this platform for.

Read more
Product product image

Sony WH-1000XM5 Review: Best-in-Class Noise Cancellation With Real Trade-offs

No ratings yet

The Best Noise Cancellation You Can Buy — With Some Real Caveats I've been wearing Sony's WH-1000XM5 headphones almost every day for the past six months. Planes, trains, busy coffee shops, open-plan offices — these headphones have been with me through all of it. And my verdict is complicated: the noise cancellation is genuinely the best I've ever experienced, but Sony made several design decisions with this fifth generation that have me missing my old XM4s more than I'd like to admit. Let's get into it honestly. Noise Cancellation: Still Class-Leading The XM5 uses 8 microphones and a new processor to handle noise cancellation, and the difference is real. On a flight from New York to Los Angeles, the constant engine roar dropped to a barely-there hum. In a coffee shop with a steamer going full blast, conversations around me became background. This is genuinely the best passive noise isolation combined with active noise cancellation I've tested at any price point. Sony's "Speak-to-Chat" feature, which auto-pauses music when you start talking, works surprisingly well and doesn't false-trigger as often as it used to. Ambient sound mode is also excellent — you can have a full conversation without removing the headphones, and it sounds natural rather than processed. "On a transatlantic flight, I genuinely forgot I was sitting six inches from another human being." The Comfort Problem Here's where I have to be honest: the XM5 is less comfortable than the XM4 for extended wear. The culprit is the new headband design. Sony went with a wider, flatter headband that looks sleeker but creates more pressure at the top of your head. After about three hours, I start noticing it. With the XM4, I could wear headphones for six hours straight without issue. The ear cup cushions are softer material than before, which helps, but the headband pressure problem is real for people with longer sessions. If you're using these primarily for travel (where sessions are naturally broken up), this matters less. For all-day desk use, it's worth considering. The other significant design change: the XM5 no longer folds flat. The XM4 folded down for compact storage. The XM5 does not. It ships with a slightly larger case to compensate. For travel with a carry-on, this is genuinely annoying. Touch Controls: Finicky More Than I'd Like The touch controls on the right ear cup work well for basic gestures — tap to pause, swipe up/down for volume. But I'd estimate about 20% of my volume swipes register as song skips instead. It's not a dealbreaker, but it happens enough to be mildly frustrating on a regular basis. The XM4 had a touch panel that felt more reliable. The "Quick Attention" feature — hold your hand over the right cup to instantly activate ambient mode — is genuinely useful and works every time. Multipoint Bluetooth: Good When It Works The XM5 connects to two devices simultaneously via multipoint Bluetooth. When it works, it's great — I have it paired to my laptop and phone, and switching is usually automatic. But I'd say it fails to switch correctly maybe once or twice a week, usually requiring a manual disconnect and reconnect. Not a disaster, but not the "it just works" experience I hoped for. Sound Quality The default sound profile leans slightly bass-heavy, but not overwhelmingly so. The Sony Headphones Connect app gives you a solid equalizer to dial in your preferences. Soundstage is wide for a closed-back headphone. Call quality is excellent — voice clarity is some of the best in this category, and multiple test callers reported my voice sounded clear even in noisy environments. Battery life is rated at 30 hours with noise cancellation on, and I get roughly that in real use. Charges to full in about 3.5 hours. A quick 3-minute charge gives you roughly 3 hours of playback — useful if you're running out the door. How It Compares The two main competitors are the Bose QuietComfort Ultra and the Apple AirPods Max . The Bose QC Ultra is the closest competition — slightly better comfort (especially the headband), and Bose's noise cancellation is genuinely comparable now. The Sony edges it out on sound customization and battery life. The AirPods Max are exceptional if you're all-in on Apple ecosystem (the Adaptive Audio mode is incredible), but at $549 they're a different price tier and the charging case remains one of the worst peripheral designs in recent memory. Who Should Buy This? Frequent travelers: Yes, absolutely. The noise cancellation is worth it. All-day desk users: Consider the Bose QC Ultra instead for better headband comfort. XM4 owners: Unless noise cancellation is your top priority, the upgrade isn't dramatic. First-time premium headphone buyers: These are the safe, excellent choice. Bottom line: 8.5/10. The best noise cancellation available. Just know that the XM4 was more comfortable for marathon sessions, the fold-flat design is gone, and the touch controls have a reliability issue that Sony should patch. Buy with eyes open. This article was written by the HonestyHive team to demonstrate the kind of honest, in-depth content we're building this platform for.

Read more
Product product image